The most common transition method for IPv6 (that is: how to enable IPv6 on a network that does not have a native IPv6 connection to the Internet) is a “6in4” tunnel. Other tunneling methods such as Teredo or SixXS are found on different literatures as well. However, another method that is not often explained is to tunnel the IPv6 packets through a normal VPN connection. For example, if the main office has a native IPv6 connection to the Internet as well as VPN connections to its remote offices, it is easy to bring IPv6 subnets to these stations. Here comes an example with two Palo Alto firewalls.
I assume that there is already a VPN connection between two Palo Alto firewalls in place. If so, the steps to tunnel IPv6 through this VPN tunnel are quite easy. (Note that this is NOT a 6in4 tunnel! It is simply a forwarding of IPv6 packets through a common IPsec site-to-site VPN.)
Tunneling
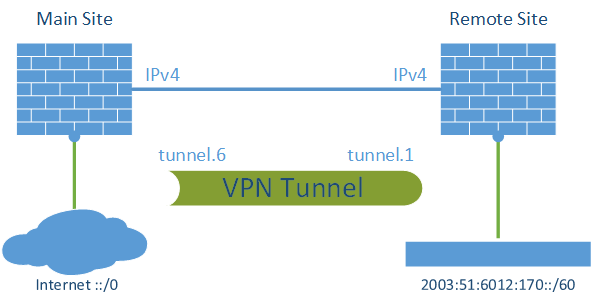
I am using two PA-200 firewalls with PAN-OS 7.1.1. One firewall has a static IPv4 address, the other one is dynamic. I am routing a /60 through the tunnel to have a maximum of 16 subnets on the remote site. This is how the lab looks like:
The basic step is to enable IPv6 on the tunnel interfaces and to route the IPv6 traffic appropriately. Of course, all other interface configuration steps such as router advertisements as well as security policies must be configured, too.
Main Site
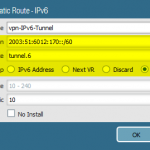
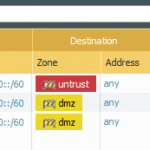
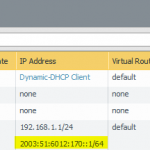
These are the configuration steps on the main site in order to route the IPv6 subnet through the tunnel. See the screenshot descriptions for more details:
Remote Site
Very similar: the remote site. Note the default IPv6 route through the tunnel:
Latency & Hop Count
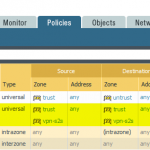
After committing everything the traffic log shows some IPv6 connections, either from trust to vpn-s2s (on the remote site), or from vpn-s2s to untrust (on the main site):
It is interesting to see the IPv6 ping times from the remote site compared to the IPv4 ping times. Since the IPv6 connections must travel through the IPv4 VPN tunnel via the Internet before reaching the real destination, the RTT should be much higher than the IPv4 times. However, everything is relative. ;) The ping times (IPv6 and IPv4) on my main site are both around 5-8 ms in the following example:
|
1 2 3 4 5 6 7 8 9 10 11 12 13 14 15 16 17 18 19 20 21 22 23 24 25 26 27 28 29 |
C:\Users\weberj>ping -4 www.insinuator.net Ping wird ausgeführt für www.insinuator.net [62.159.96.203] mit 32 Bytes Daten: Antwort von 62.159.96.203: Bytes=32 Zeit=8ms TTL=57 Antwort von 62.159.96.203: Bytes=32 Zeit=6ms TTL=57 Antwort von 62.159.96.203: Bytes=32 Zeit=8ms TTL=57 Antwort von 62.159.96.203: Bytes=32 Zeit=5ms TTL=57 Ping-Statistik für 62.159.96.203: Pakete: Gesendet = 4, Empfangen = 4, Verloren = 0 (0% Verlust), Ca. Zeitangaben in Millisek.: Minimum = 5ms, Maximum = 8ms, Mittelwert = 6ms C:\Users\weberj> C:\Users\weberj> C:\Users\weberj>ping -6 www.insinuator.net Ping wird ausgeführt für www.insinuator.net [2003:60:4010:11b0::12] mit 32 Bytes Daten: Antwort von 2003:60:4010:11b0::12: Zeit=5ms Antwort von 2003:60:4010:11b0::12: Zeit=5ms Antwort von 2003:60:4010:11b0::12: Zeit=5ms Antwort von 2003:60:4010:11b0::12: Zeit=5ms Ping-Statistik für 2003:60:4010:11b0::12: Pakete: Gesendet = 4, Empfangen = 4, Verloren = 0 (0% Verlust), Ca. Zeitangaben in Millisek.: Minimum = 5ms, Maximum = 5ms, Mittelwert = 5ms |
But since my remote site is a DSL connection with a slower latency at all, the IPv6 burden is not that high, as seen here. Both connections are around 30 ms:
|
1 2 3 4 5 6 7 8 9 10 11 12 13 14 15 16 17 18 19 20 21 22 23 24 25 26 27 28 29 |
C:\Users\Johannes Weber>ping -4 www.insinuator.net Ping wird ausgeführt für www.insinuator.net [62.159.96.203] mit 32 Bytes Daten: Antwort von 62.159.96.203: Bytes=32 Zeit=32ms TTL=54 Antwort von 62.159.96.203: Bytes=32 Zeit=31ms TTL=54 Antwort von 62.159.96.203: Bytes=32 Zeit=31ms TTL=54 Antwort von 62.159.96.203: Bytes=32 Zeit=31ms TTL=54 Ping-Statistik für 62.159.96.203: Pakete: Gesendet = 4, Empfangen = 4, Verloren = 0 (0% Verlust), Ca. Zeitangaben in Millisek.: Minimum = 31ms, Maximum = 32ms, Mittelwert = 31ms C:\Users\Johannes Weber> C:\Users\Johannes Weber> C:\Users\Johannes Weber>ping -6 www.insinuator.net Ping wird ausgeführt für www.insinuator.net [2003:60:4010:11b0::12] mit 32 Bytes Daten: Antwort von 2003:60:4010:11b0::12: Zeit=35ms Antwort von 2003:60:4010:11b0::12: Zeit=29ms Antwort von 2003:60:4010:11b0::12: Zeit=30ms Antwort von 2003:60:4010:11b0::12: Zeit=29ms Ping-Statistik für 2003:60:4010:11b0::12: Pakete: Gesendet = 4, Empfangen = 4, Verloren = 0 (0% Verlust), Ca. Zeitangaben in Millisek.: Minimum = 29ms, Maximum = 35ms, Mittelwert = 30ms |
That’s it.
Featured image “Golden Tunnel” by Sam Bald is licensed under CC BY 2.0.







What is the software that was used to create these cisco network diagrams? Is it creately ?
No, it’s simply Microsoft Visio 2013.
Pretty element of content. I simply stumbled upon your blog and in accession capital to say that I acquire actually loved account your
blog posts. Anyway I’ll be subscribing on your feeds and even I fulfillment you get right of
entry to constantly rapidly.