This post describes how to add a Linux machine to the MRTG/Routers2 monitoring server. First, the host must be able to process SNMP requests. Then, a *.cfg file for MRTG/Routers2 is created by running the “cfgmaker” tool with a host-template. Since a few values are wrong in the cfgmaker file, I also explain how to correct them. Finally, I am adding the mrtg-ping-probe lines to the configuration.
Installation of SNMP
Two packages are mandatory for SNMP: snmp which is the tool to send SNMP requests to a machine, and snmpd which is the daemon to listen on port 161 for incoming SNMP requests. On a Ubuntu machine, both packets can easily be installed with:
|
1 |
sudo apt-get install snmp snmpd |
After that, the snmpd configuration must be customized in order to allow incoming SNMP requests. This slightly depends on whether these requests are sent from the localhost (e.g., if the MRTG machine wants to query itself), or from a remote host over the network (which is the normal case). In both cases, the snmpd.conf file must be opened with:
|
1 |
sudo nano /etc/snmp/snmpd.conf |
In the snmpd.conf, a paragraph called “AGENT BEHAVIOUR” specifies the listening state of snmpd. In order to allow incoming requests from any machine via IPv6 and legacy IP, the following line fits:
|
1 |
agentAddress udp:161,udp6:161 |
In the paragraph called “ACCESS CONTROL” a line that allows an SNMP COMMUNITY for read-only access can be specified like this examples, depending on IPv6 or nor:
|
1 2 3 |
rocommunity public localhost rocommunity COMMUNITY 192.168.0.0/16 rocommunity6 COMMUNITY 2003:de:2016:100::/56 |
Now restart the daemon with sudo service snmpd restart and test the configuration with the snmpwalk tool which runs through all (!) SNMP values the localhost presents: snmpwalk -v 2c -c public localhost .1.3.6. IPv6 pendant: snmpwalk -v 2c -c THISISTHEKEY udp6:host.domain.tld .1.3.6 . If there are many hundreds lines flowing over the screen, everything is ok.
Creating the CFG File
I am creating my *.cfg files for Linux servers with the host-generic.htp from Steve Shipways forum here. The main command is the following:
|
1 |
sudo cfgmaker --snmp-options=:::::2 --host-template=host-generic.htp --output=jw-vm01.cfg COMMUNITY@192.168.4.11 |
Again, for IPv6 you must use the following command:
|
1 |
sudo cfgmaker --snmp-options=:::::2 --enable-ipv6 --host-template=host-generic.htp --output=jw-vm01.cfg COMMUNITY@host.domain.tld |
This creates the “jw-vm01.cfg” file and customizes the settings. This file must then be copied into the “/etc/mrtg/” folder. MRTG will then query it. However, I advise to change the following lines:
- Delete all lines under the “### Global Config Options” because they are not needed. Especially the “WorkDir:” value is wrong at this position since it is already specified in the global mrtg.cfg configuration file if it is installed due to my tutorial.
- The memory values are wrongly calculated with the host template: They need to be multiplied with 1024. E.g., instead of
it must be1MaxBytes1[192.168.9.6-memory]: 448180
1MaxBytes1[192.168.9.6-memory]: 458936320 - The CPU, memory, and the filesystem graphs are not shown from “0 – 100 %” but only from “0 – current max value %”. In my opinion I get more information if the graph always shows up to 100 %. So I added the following lines to the appropriate sections of the CPU, memory, and all disks (replace “xy” by the disk value shown in the other lines):
123Unscaled[localhost-cpu]: dwmyUnscaled[localhost-memory]: dwmyUnscaled[localhost.disk.xy]: dwmy - I like all interfaces with a graph type of mirror. That is, for all interfaces:
1routers.cgi*GraphStyle[localhost_interface]: mirror - Furthermore, I am always adding a ping to the node (which is not much interesting at the localhost in this example here, though). This requires to have the “mrtg-ping-probe” packaged installed. I listed the MRTG/Routers2 config here.
- Finally, I have a recurrent coloring style, i.e., yellow for CPU, pink for processes, turquoise for users, and orange for RAM. So I added the following lines inside the appropriate sections:
12345Colours[localhost-cpu]: Lightyellow#FEED01, Blue#0000FF, Orange#FF6307, Purple#FF00FFColours[localhost-memory]: Orange#FC7C01, Green#00CC00, Darkred#660000, Darkgreen#006600Colours[localhost-lavg]: Lightyellow#FEED01, Blue#0000FF, Orange#FF6307, Purple#FF00FFColours[localhost-users]: Turquois#00CCCC, Darkyellow#CCCC00, Darkturquois#377D77, Orange#E97F02Colours[localhost-procs]: Pink#FF00AA, Yellow#FFD600, Darkpurple#7608AA, Orange#FC7C01
Here is an example of my localhost *.cfg file with all the above mentioned changes:
|
1 2 3 4 5 6 7 8 9 10 11 12 13 14 15 16 17 18 19 20 21 22 23 24 25 26 27 28 29 30 31 32 33 34 35 36 37 38 39 40 41 42 43 44 45 46 47 48 49 50 51 52 53 54 55 56 57 58 59 60 61 62 63 64 65 66 67 68 69 70 71 72 73 74 75 76 77 78 79 80 81 82 83 84 85 86 87 88 89 90 91 92 93 94 95 96 97 98 99 100 101 102 103 104 105 106 107 108 109 110 111 112 113 114 115 116 117 118 119 120 121 122 123 124 125 126 127 128 129 130 131 132 133 134 135 136 137 138 139 140 141 142 143 144 145 146 147 148 149 150 151 152 153 154 155 156 157 158 159 160 161 162 163 164 165 166 167 168 169 170 171 172 173 174 175 176 177 178 179 180 181 182 183 184 185 186 187 188 189 190 191 192 193 194 195 196 197 198 199 200 201 202 203 204 205 206 207 208 209 210 211 212 213 214 215 216 217 218 219 220 221 222 223 224 225 226 227 228 229 230 231 232 233 234 235 236 237 238 239 240 241 242 243 244 245 246 247 248 249 250 251 252 |
# Created by # /usr/bin/cfgmaker --snmp-options=:::::2 --host-template=host-generic.htp --output=jw-vm01.cfg public@localhost ###################################################################### # System: jw-vm01 # Description: Linux jw-vm01 3.8.0-34-generic #49~precise1-Ubuntu SMP Wed Nov 13 18:08:04 UTC 2013 i686 # Contact: Me <me@example.org> # Location: Sitting on the Dock of the Bay ###################################################################### #--------------------------------------------------------------------- routers.cgi*Icon: linux-sm.gif routers.cgi*ShortDesc: jw-vm01 MRTG #------------------------------------------------- ####################################### # CPU load Target[localhost-cpu]: 100 - 1.3.6.1.4.1.2021.11.11.0&1.3.6.1.4.1.2021.11.11.0:public@localhost:::::2 PageTop[localhost-cpu]: localhost CPU usage Title[localhost-cpu]: CPU on localhost Maxbytes[localhost-cpu]: 100 Options[localhost-cpu]: gauge YLegend[localhost-cpu]: percent ShortLegend[localhost-cpu]: % LegendI[localhost-cpu]: cpu: Legend1[localhost-cpu]: CPU usage Legend3[localhost-cpu]: Peak CPU usage Unscaled[localhost-cpu]: dwmy Colours[localhost-cpu]: Lightyellow#FEED01, Blue#0000FF, Orange#FF6307, Purple#FF00FF routers.cgi*Options[localhost-cpu]: noo, nopercent, nototal, fixunit routers.cgi*InOut[localhost-cpu]: no routers.cgi*ShortDesc[localhost-cpu]:CPU routers.cgi*Icon[localhost-cpu]: chip-sm.gif routers.cgi*InSummary[localhost-cpu]: yes routers.cgi*InCompact[localhost-cpu]: yes routers.cgi*Mode[localhost-cpu]: cpu routers.cgi*MBLegend[localhost-cpu]: 100% usage ####################################### # Memory used Target[localhost-memory]: 1.3.6.1.4.1.2021.4.6.0&1.3.6.1.4.1.2021.4.4.0:public@localhost:::::2 * 1024 PageTop[localhost-memory]: localhost Memory Available Title[localhost-memory]: Available Memory on localhost SetEnv[localhost-memory]: MRTG_INT_DESCR="Memory" MaxBytes1[localhost-memory]: 520007680 MaxBytes2[localhost-memory]: 532672512 Options[localhost-memory]: gauge UnScaled[localhost-memory]: dwmy Colours[localhost-memory]: Orange#FC7C01, Green#00CC00, Darkred#660000, Darkgreen#006600 YLegend[localhost-memory]: Bytes ShortLegend[localhost-memory]: b LegendI[localhost-memory]: real: LegendO[localhost-memory]: swap: Legend1[localhost-memory]: Available real memory Legend2[localhost-memory]: Available swap space Legend3[localhost-memory]: Peak available real Legend4[localhost-memory]: Peak available swap routers.cgi*Options[localhost-memory]: nototal routers.cgi*Mode[localhost-memory]: memory routers.cgi*ShortDesc[localhost-memory]: Memory routers.cgi*Description[localhost-memory]: Memory available: localhost routers.cgi*InOut[localhost-memory]: no routers.cgi*InSummary[localhost-memory]: yes routers.cgi*InCompact[localhost-memory]: yes routers.cgi*Icon[localhost-memory]: chip-sm.gif routers.cgi*MBLegend[localhost-memory]: 100% usage ####################################### # Filesystem / Target[localhost.disk.31]: 1.3.6.1.2.1.25.2.3.1.6.31&1.3.6.1.2.1.25.2.3.1.6.31:public@localhost:::::2 * 4096 PageTop[localhost.disk.31]: localhost Disk space used (/) Title[localhost.disk.31]: Disk space used on localhost (/) SetEnv[localhost.disk.31]: MRTG_INT_DESCR="/" MaxBytes[localhost.disk.31]: 20202565632 Options[localhost.disk.31]: gauge YLegend[localhost.disk.31]: Bytes ShortLegend[localhost.disk.31]: b LegendI[localhost.disk.31]: used: Legend1[localhost.disk.31]: Space used Legend3[localhost.disk.31]: Peak used Unscaled[localhost.disk.31]: dwmy routers.cgi*Options[localhost.disk.31]: nototal, noo routers.cgi*Mode[localhost.disk.31]: general routers.cgi*ShortDesc[localhost.disk.31]: Disk: / routers.cgi*Description[localhost.disk.31]: localhost space used on / routers.cgi*InOut[localhost.disk.31]: no routers.cgi*InMenu[localhost.disk.31]: yes routers.cgi*InSummary[localhost.disk.31]: yes routers.cgi*InCompact[localhost.disk.31]: yes routers.cgi*Icon[localhost.disk.31]: dir-sm.gif routers.cgi*Graph[localhost.disk.31]: localhost-filesystems "Disk space" withtotal noo ####################################### # Filesystem /dev Target[localhost.disk.33]: 1.3.6.1.2.1.25.2.3.1.6.33&1.3.6.1.2.1.25.2.3.1.6.33:public@localhost:::::2 * 4096 PageTop[localhost.disk.33]: localhost Disk space used (/dev) Title[localhost.disk.33]: Disk space used on localhost (/dev) SetEnv[localhost.disk.33]: MRTG_INT_DESCR="/dev" MaxBytes[localhost.disk.33]: 516907008 Options[localhost.disk.33]: gauge YLegend[localhost.disk.33]: Bytes ShortLegend[localhost.disk.33]: b LegendI[localhost.disk.33]: used: Legend1[localhost.disk.33]: Space used Legend3[localhost.disk.33]: Peak used Unscaled[localhost.disk.33]: dwmy routers.cgi*Options[localhost.disk.33]: nototal, noo routers.cgi*Mode[localhost.disk.33]: general routers.cgi*ShortDesc[localhost.disk.33]: Disk: /dev routers.cgi*Description[localhost.disk.33]: localhost space used on /dev routers.cgi*InOut[localhost.disk.33]: no routers.cgi*InMenu[localhost.disk.33]: yes routers.cgi*InSummary[localhost.disk.33]: yes routers.cgi*InCompact[localhost.disk.33]: yes routers.cgi*Icon[localhost.disk.33]: dir-sm.gif routers.cgi*Graph[localhost.disk.33]: localhost-filesystems "Disk space" withtotal noo ####################################### # Filesystem /boot Target[localhost.disk.34]: 1.3.6.1.2.1.25.2.3.1.6.34&1.3.6.1.2.1.25.2.3.1.6.34:public@localhost:::::2 * 1024 PageTop[localhost.disk.34]: localhost Disk space used (/boot) Title[localhost.disk.34]: Disk space used on localhost (/boot) SetEnv[localhost.disk.34]: MRTG_INT_DESCR="/boot" MaxBytes[localhost.disk.34]: 238787584 Options[localhost.disk.34]: gauge YLegend[localhost.disk.34]: Bytes ShortLegend[localhost.disk.34]: b LegendI[localhost.disk.34]: used: Legend1[localhost.disk.34]: Space used Legend3[localhost.disk.34]: Peak used Unscaled[localhost.disk.34]: dwmy routers.cgi*Options[localhost.disk.34]: nototal, noo routers.cgi*Mode[localhost.disk.34]: general routers.cgi*ShortDesc[localhost.disk.34]: Disk: /boot routers.cgi*Description[localhost.disk.34]: localhost space used on /boot routers.cgi*InOut[localhost.disk.34]: no routers.cgi*InMenu[localhost.disk.34]: yes routers.cgi*InSummary[localhost.disk.34]: yes routers.cgi*InCompact[localhost.disk.34]: yes routers.cgi*Icon[localhost.disk.34]: dir-sm.gif routers.cgi*Graph[localhost.disk.34]: localhost-filesystems "Disk space" withtotal noo routers.cgi*Options[localhost-filesystems]: available routers.cgi*Icon[localhost-filesystems]: dir-sm.gif routers.cgi*ShortDesc[localhost-filesystems]: Filesystems routers.cgi*Title[localhost-filesystems]: Filesystems on localhost ####################################### # Load average Target[localhost-lavg]: 1.3.6.1.4.1.2021.10.1.5.2&1.3.6.1.4.1.2021.10.1.5.3:public@localhost:::::2 / 100 PageTop[localhost-lavg]: localhost Load Average Title[localhost-lavg]: Load Average on localhost SetEnv[localhost-lavg]: MRTG_INT_DESCR="Load Average" MaxBytes[localhost-lavg]: 1000 Colours[localhost-lavg]: Lightyellow#FEED01, Blue#0000FF, Orange#FF6307, Purple#FF00FF Options[localhost-lavg]: nopercent, gauge YLegend[localhost-lavg]: Processes ShortLegend[localhost-lavg]: LegendI[localhost-lavg]: 5min avg: LegendO[localhost-lavg]: 15min avg: Legend1[localhost-lavg]: 5-min load average Legend2[localhost-lavg]: 15-min load average Legend3[localhost-lavg]: Peak 5-min load average Legend4[localhost-lavg]: Peak 15-min load average routers.cgi*Options[localhost-lavg]: nomax, nototal, fixunit, noo routers.cgi*Mode[localhost-lavg]: general routers.cgi*ShortDesc[localhost-lavg]: Load Avg routers.cgi*Description[localhost-lavg]: Load average: localhost routers.cgi*UnScaled[localhost-lavg]: none routers.cgi*WithPeak[localhost-lavg]: none routers.cgi*InOut[localhost-lavg]: no routers.cgi*InSummary[localhost-lavg]: yes routers.cgi*InCompact[localhost-lavg]: no routers.cgi*Icon[localhost-lavg]: load-sm.gif ####################################### # User count Target[localhost-users]: 1.3.6.1.2.1.25.1.5.0&1.3.6.1.2.1.25.1.5.0:public@localhost:::::2 PageTop[localhost-users]: localhost Active users Title[localhost-users]: Active Users on localhost MaxBytes[localhost-users]: 1000 SetEnv[localhost-users]: MRTG_INT_DESCR="Users" Colours[localhost-users]: Turquois#00CCCC, Darkyellow#CCCC00, Darkturquois#377D77, Orange#E97F02 Options[localhost-users]: nopercent, gauge YLegend[localhost-users]: Users ShortLegend[localhost-users]: LegendI[localhost-users]: Users Legend1[localhost-users]: Active Users Legend3[localhost-users]: Peak Active Users routers.cgi*Options[localhost-users]: nomax, nototal, fixunit, noo routers.cgi*Mode[localhost-users]: general routers.cgi*ShortDesc[localhost-users]: Users routers.cgi*Description[localhost-users]: Users on localhost routers.cgi*UnScaled[localhost-users]: none routers.cgi*InOut[localhost-users]: no routers.cgi*InSummary[localhost-users]: yes routers.cgi*InCompact[localhost-users]: no routers.cgi*Icon[localhost-users]: user-sm.gif ####################################### # Process count Target[localhost-procs]: 1.3.6.1.2.1.25.1.6.0&1.3.6.1.2.1.25.1.6.0:public@localhost:::::2 PageTop[localhost-procs]: localhost Processes Title[localhost-procs]: Processes on localhost MaxBytes[localhost-procs]: 10000 Colours[localhost-procs]: Pink#FF00AA, Yellow#FFD600, Darkpurple#7608AA, Orange#FC7C01 routers.cgi*Options[localhost-procs]: nototal, fixunit, noo, nomax SetEnv[localhost-procs]: MRTG_INT_DESCR="Procs" Options[localhost-procs]: nopercent, gauge YLegend[localhost-procs]: Processes ShortLegend[localhost-procs]: LegendI[localhost-procs]: Procs Legend1[localhost-procs]: Processes Legend3[localhost-procs]: Peak Processes routers.cgi*Mode[localhost-procs]: general routers.cgi*ShortDesc[localhost-procs]: Processes routers.cgi*Description[localhost-procs]: Processes on localhost routers.cgi*UnScaled[localhost-procs]: none routers.cgi*InOut[localhost-procs]: no routers.cgi*InSummary[localhost-procs]: yes routers.cgi*InCompact[localhost-procs]: no routers.cgi*Icon[localhost-procs]: list-sm.gif routers.cgi*MBLegend[localhost-procs]: Max capacity ### Interface 1 >> Descr: 'lo' | Name: 'lo' | Ip: '127.0.0.1' | Eth: 'No Ethernet Id' ### ### The following interface is commented out because: ### * it is a Software Loopback interface # # Target[localhost_lo]: #lo:public@localhost:::::2 # SetEnv[localhost_lo]: MRTG_INT_IP="127.0.0.1" MRTG_INT_DESCR="lo" # MaxBytes[localhost_lo]: 1250000 # Title[localhost_lo]: Traffic Analysis for lo -- jw-vm01 ### Interface 2 >> Descr: 'eth0' | Name: 'eth0' | Ip: '192.168.120.13' | Eth: '00-0c-29-be-67-4d' ### Target[localhost_eth0]: #eth0:public@localhost:::::2 SetEnv[localhost_eth0]: MRTG_INT_IP="192.168.120.13" MRTG_INT_DESCR="eth0" MaxBytes[localhost_eth0]: 125000000 Title[localhost_eth0]: Traffic Analysis for eth0 -- jw-vm01 routers.cgi*GraphStyle[localhost_eth0]: mirror ################################################################################################################ ################################################ Ping outside IP ############################################### ################################################################################################################ #Since mrtg-ping-probe outputs an integer, the values are multiplied to have milliseconds reported #i.e., instead of "5" the answer is now "5324" which is interpreted by Factor[] as 5.324 ms Target[localhost_ping]: `mrtg-ping-probe -p '1000*max/1000*min' -s localhost` Title[localhost_ping]: Ping Times to localhost #MaxBytes: 100 ms * 1000 (due to mrtg-ping-probe *1000) MaxBytes[localhost_ping]: 100000 #AbsMax: 10 seconds AbsMax[localhost_ping]: 10000000 Options[localhost_ping]: gauge Factor[localhost_ping]: 0.001 Colours[localhost_ping]: Red#FF0000, Whatever#000000, Darkred#800000, Whatever2#FFFFFF routers.cgi*ShortName[localhost_ping]: Ping localhost routers.cgi*Options[localhost_ping]: fixunit nomax nopercentile nototal routers.cgi*GraphStyle[localhost_ping]: range routers.cgi*Icon[localhost_ping]: clock-sm.gif |
Graphs
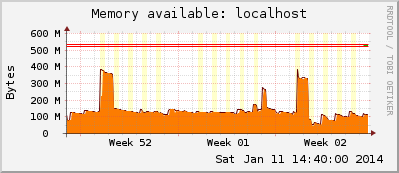
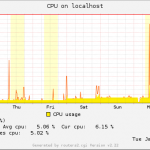
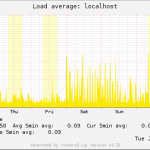
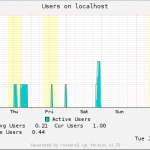
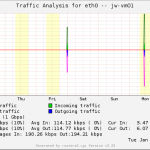
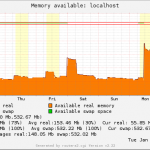
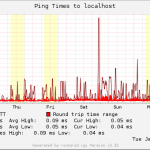
If everything is ok and MRTG stores the values correctly, the graphs should grow every five minutes and look like that:
[UPDATE] Raspberry Pi Temperature
When querying a Raspberry Pi you can also monitor the CPU temperature. This is the procedure: Extend the SNMP service on the Pi to hand out the temperature:
|
1 2 3 4 5 6 |
sudo nano /etc/snmp/snmpd.conf # EXTENDING THE AGENT extend-sh temperature cat /sys/class/thermal/thermal_zone*/temp sudo service snmpd restart |
Walking the SNMP tree I found for example the following OID: 1.3.6.1.4.1.8072.1.3.2.3.1.1.11.116.101.109.112.101.114.97.116.117.114.101 or this one: 1.3.6.1.4.1.8072.1.3.2.4.1.2.5.116.101.115.116.51.1 . (I don’t know why they are different, but I don’t care.)
Add the MRTG target such as:
|
1 2 3 4 5 6 7 8 9 10 11 12 13 14 15 16 17 |
Target[host.domain.tld_temp]: 1.3.6.1.4.1.8072.1.3.2.3.1.1.11.116.101.109.112.101.114.97.116.117.114.101&PseudoZero:THISISTHEKEY@host.domain.tld:::::2 /1000 MaxBytes[host.domain.tld_temp]: 55 AbsMax[host.domain.tld_temp]: 150 Title[host.domain.tld_temp]: Temperature on host.domain.tld Options[host.domain.tld_temp]: gauge WithPeak[host.domain.tld_temp]: my Colours[host.domain.tld_temp]: Red#FF0000, Blue#0000FF, Darkred#800000, Purple#FF00FF YLegend[host.domain.tld_temp]: Temperature °C Legend1[host.domain.tld_temp]: Temperature Legend3[host.domain.tld_temp]: Peak Temperature LegendI[host.domain.tld_temp]: Temperature: ShortLegend[host.domain.tld_temp]: °C routers.cgi*Options[host.domain.tld_temp]: fixunit nomax nopercentile nototal noo routers.cgi*ShortDesc[host.domain.tld_temp]: Temperature routers.cgi*InSummary[host.domain.tld_temp]: yes routers.cgi*HRule[host.domain.tld_temp]: 55 "Baseline" routers.cgi*Icon[host.domain.tld_temp]: temp-sm.gif |
Note the HRule which inserts a line at 55 degree. Normally, a Pi should not exceed this temperature.


how to add new device in mrtg
The configuration I did worked fine but now I know how to add the ip of the new router and how to put the title name in it like I had to add 192.168.1.5
centos 7
#com2sec notConfigUser default public
com2sec local localhost public
com2sec mynetwork 192.168.42.0/24 public
group MyRWGroup v2c local
group MyROGroup v2c mynetwork
view all included .1 80
mv /etc/snmp/snmpd.conf /etc/snmp/snmpd.conf_original
cd /etc/snmp/
snmpwalk -v2c -c public localhost system
cfgmaker –snmp-options=:::::2 –ifref=descr –ifdesc=descr –global ‘WorkDir: /var/www/html/mymrtg’ public@192.168.42.166 > /etc/mrtg/mrtg.cfg
cd /var/www/html/
mkdir mymrtg
indexmaker –columns=1 /etc/mrtg/mrtg.cfg > /var/www/html/mymrtg/index.html
vi /etc/cron.d/mrtg
*/5 * * * * root LANG=C LC_ALL=C /usr/bin/mrtg /etc/mrtg/mrtg.cfg –lock-file /var/lock/mrtg/mrtg_l –confcache-file /var/lib/mrtg/mrtg.ok
vi /etc/httpd/conf.d/mrtg.conf
Alias /mrtg /var/www/html/mymrtg
Require local
# Require ip 10.1.2.3
allowoverride all
# Require host example.org
192.168.42.166/mymrtg/