
Palo Alto firewalls have a nice packet capture feature. It enables you to capture packets as they traverse the firewall. While you might be familiar with the four stages that the Palo can capture (firewall, drop, transmit, receive), it’s sometimes hard to set the correct filter – especially when it comes to NAT scenarios. (At least it was hard for me…)
I am using the packet capture feature very often for scenarios in which the IP connections are in fact working (hence no problems at the tx/rx level nor on the security policy/profile) but where I want to verify certain details of the connection itself. I’m simply using the Palo as a capturing device here, similar to a SPAN port on a switch. (Yes, I’m aware of all disadvantages of not using a real TAP and a real capture device.) In the end, I want a single pcap which shows all relevant packets for a client-server connection, even if NAT is in place. Wireshark should be able to correlate the incoming/outgoing packets into a single TCP stream. Furthermore, I definitely want to use a filter to limit the amount of captured packets. This is how I’m doing it:
I am using a PA-220 with PAN-OS 10.0.10. The screenshots are from Wireshark version 3.6.5. For the sake of simplicity, I’m only using IP addresses in the filters, not ports. To my mind, this is a reasonable tradeoff between “filtering but not too complicated”. I’m always enabling the “pre-parse match” checkbox. (Has anyone ever had a case where this checkmark saved four life? Please write a comment if so!) In addition, I’m always capturing at all four stages. For all the following tests, I did a ping followed by an SSH connection attempt.

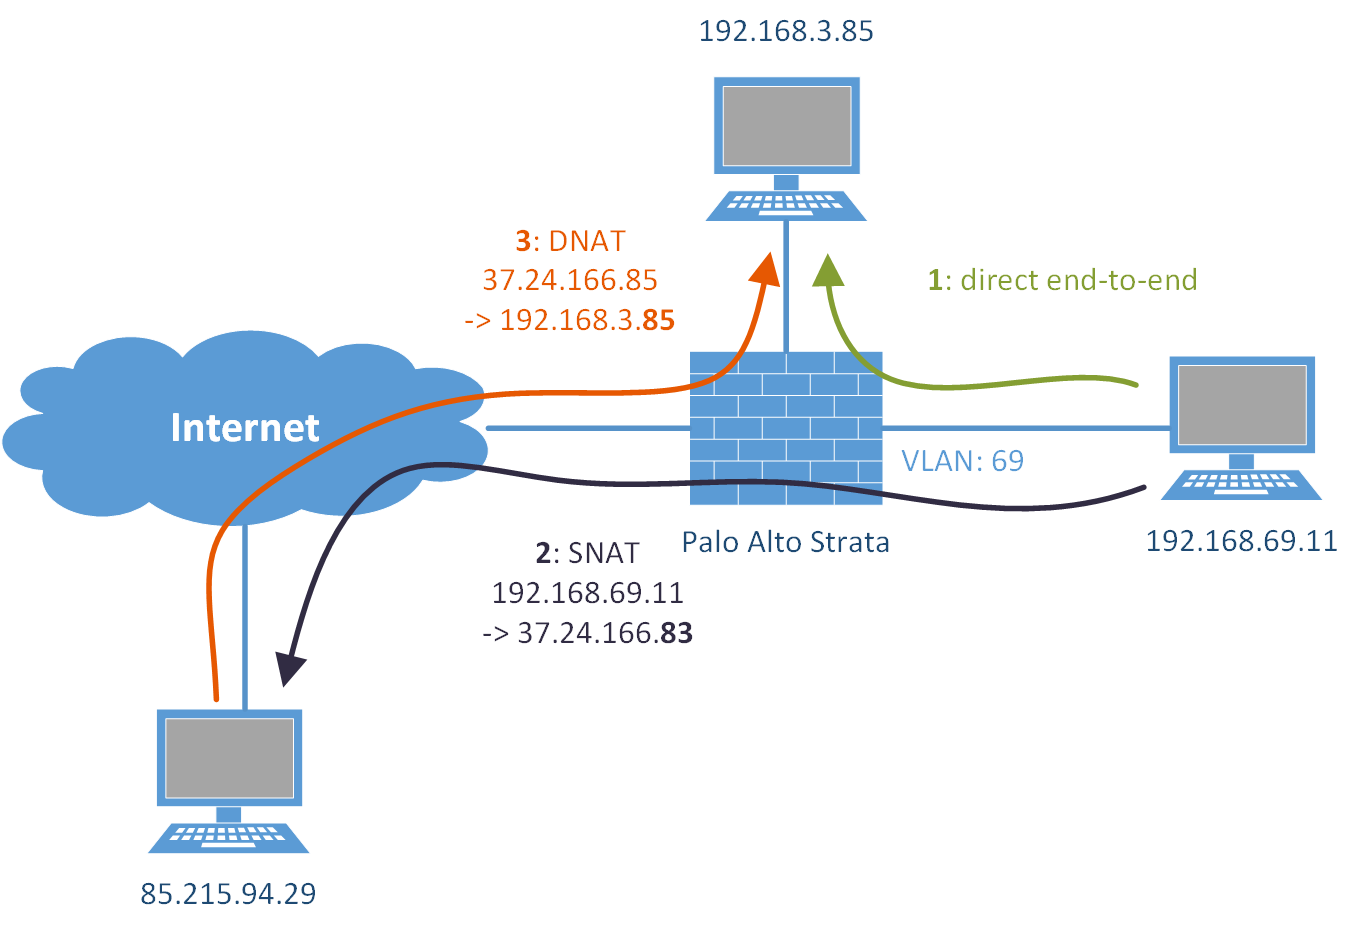
This was my test setup:
Scenario 1: End-to-End Communication w/o NAT
Ok, that’s an easy one. Simply use a single filter statement for your client -> server. Returning traffic is captured automatically. (I wasn’t sure about this for a long time.) No need for a second statement such as server -> client.
Capturing all four stages, the firewall stage has everything captured, hence Wireshark is able to correlate the echo-request/-replies as well as the whole TCP/SSH session. Never mind of the VLAN tag that is present on only one side of the connection since my client network is within VLAN 69 at this point while the other interface is untagged.

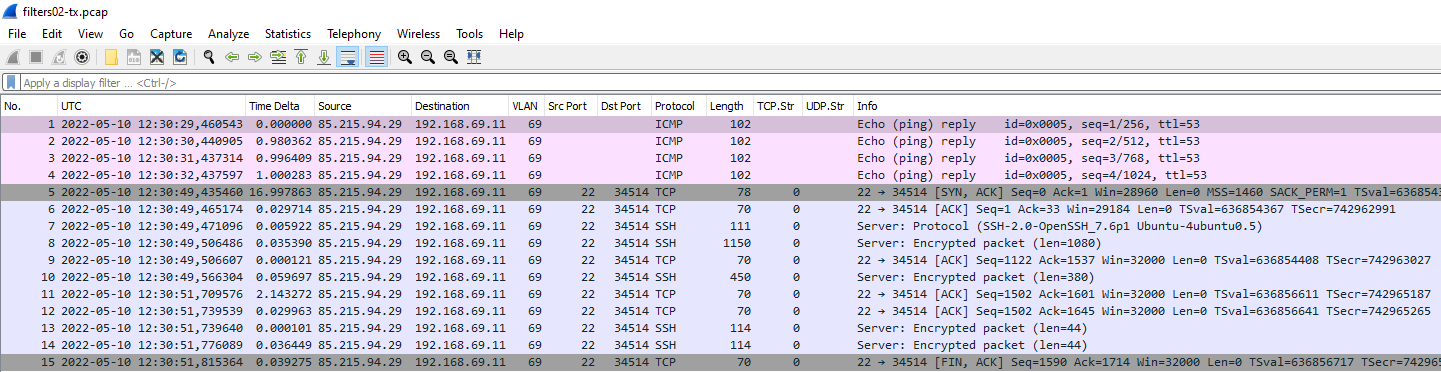
Scenario 2: Internal Client -> External Server with outgoing SNAT/PAT aka “Dynamic IP And Port”
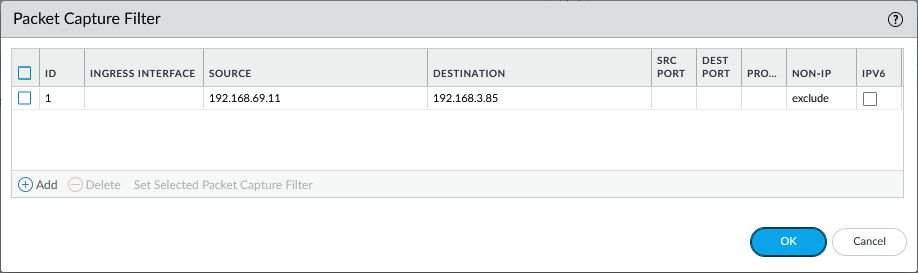
Now here’s the trick: I’m still using a single filter statement with the internal RFC1918 IPv4 address as the source and the public server IPv4 address as the destination:

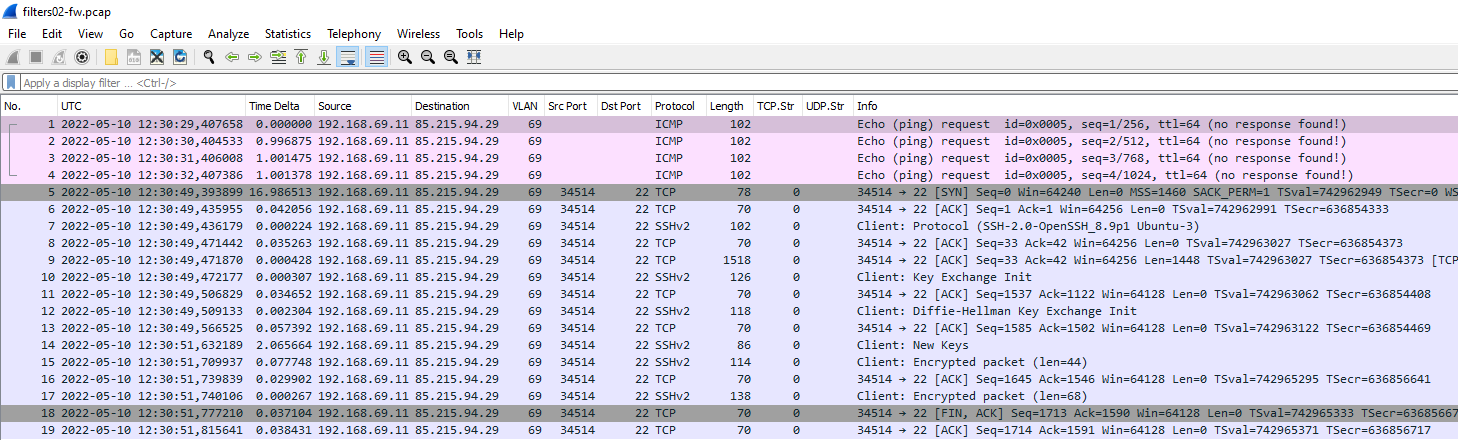
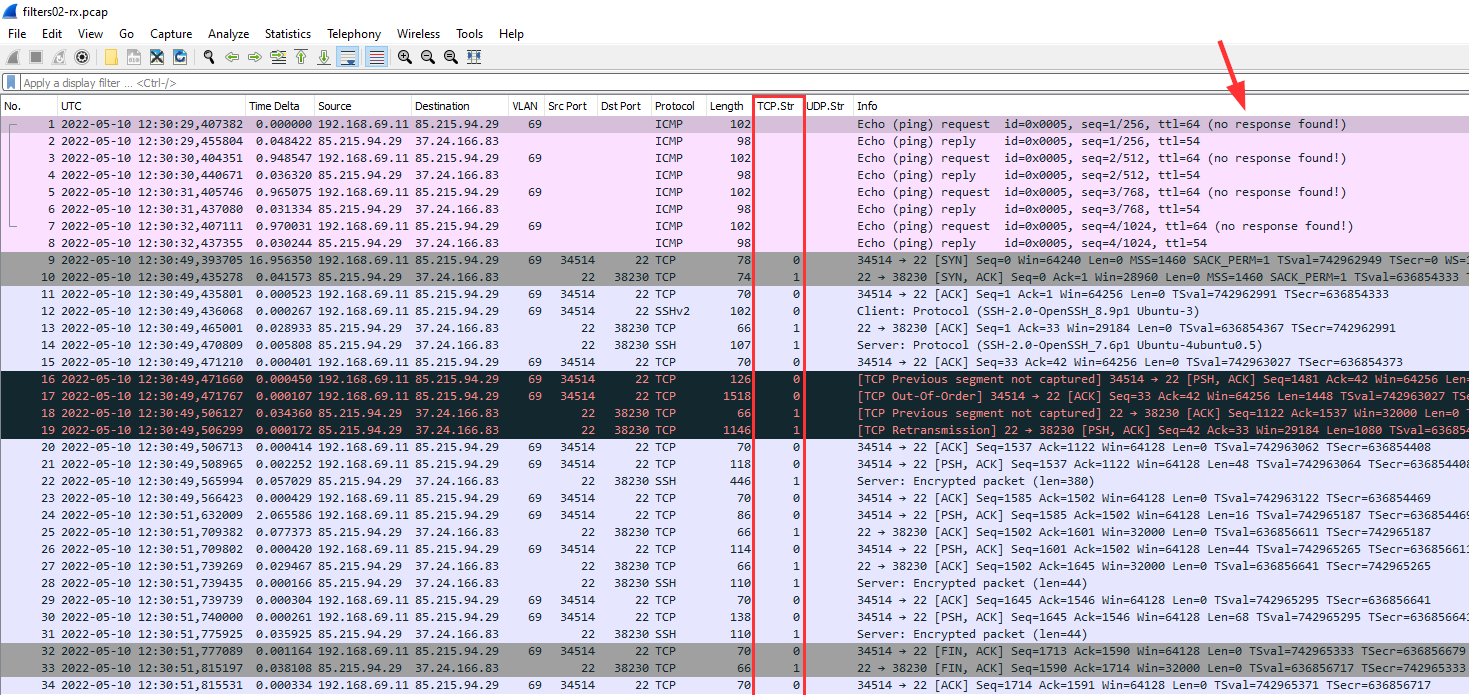
Looking at the firewall, receive, and transmit stage, none of them is complete. The firewall stage only lists the outgoing direction (RFC1918 -> dest) since the returning traffic is still NATted, hence the filter is not working; the receive stage captured the outgoing traffic (RFC1918 -> dest) and the returning, but NATed (dest -> SNAT), hence no correlation in Wireshark as well; and the transmit stage captured only the returning traffic (dest -> RFC1918):
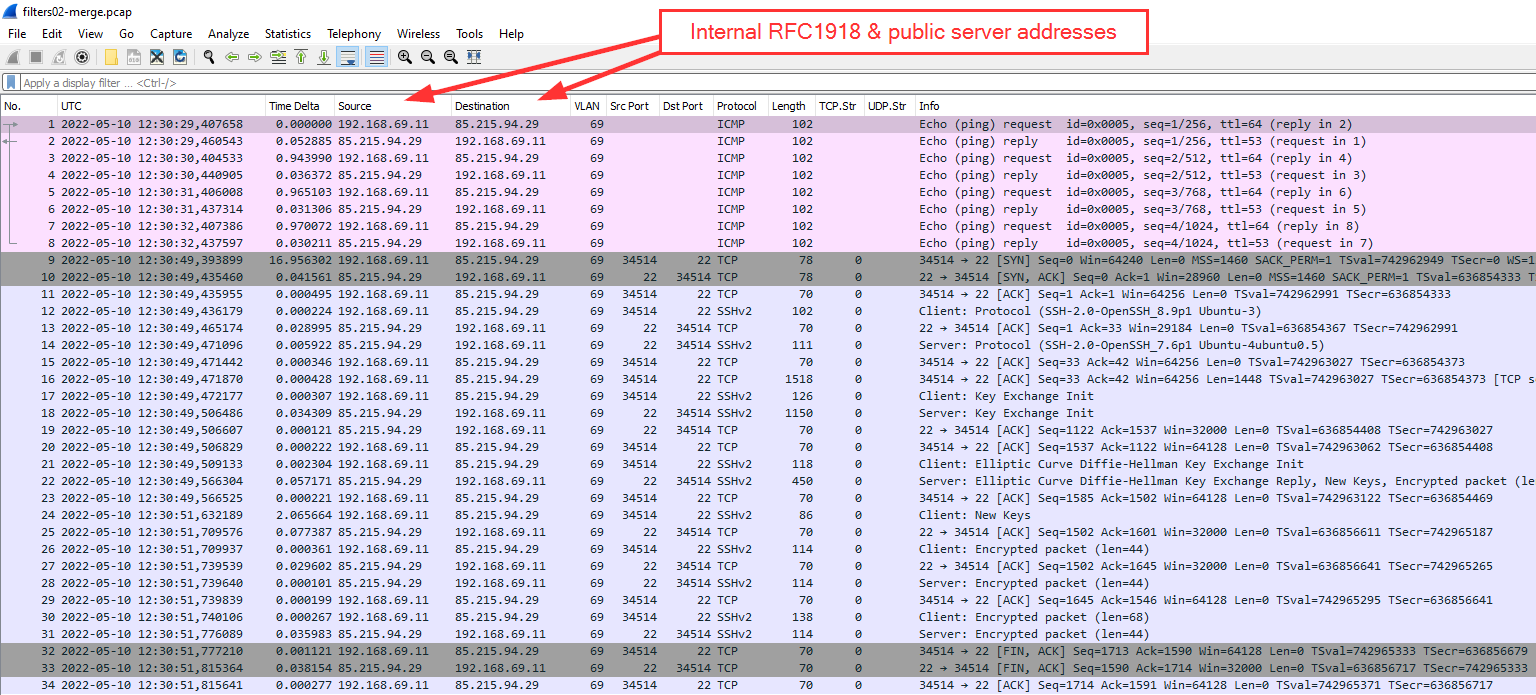
You can do this merge directly within Wireshark. Simply open the first capture, then File -> Merge… and select the second one. (Unfortunately, this merge trick with Wireshark is only working for two pcaps. :( If you have more than two to merge, you have to use mergecap.exe.)
In the end, this is it: a single view in Wireshark, ping request/replies and a single and complete TCP stream:

(I also tried other filter settings such as this:
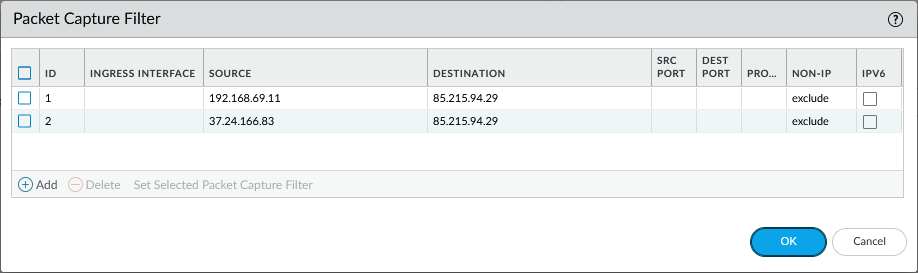
which did not lead to a single capture file from a single stage to have all streams correlated correctly. Hence I’m staying with the upper approach.)
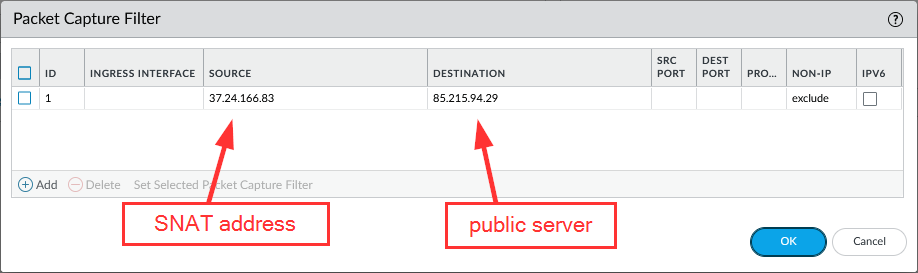
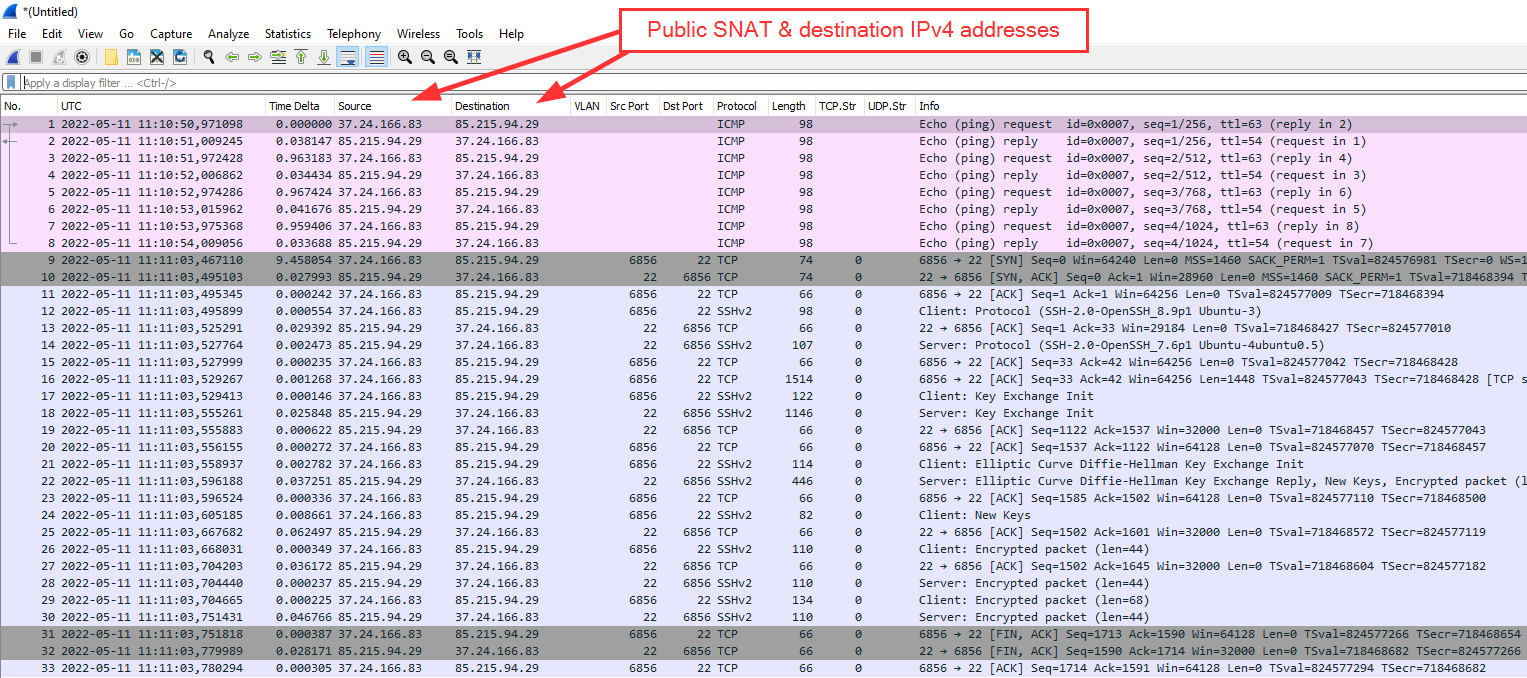
If you prefer to have the “SNAT IP -> server IP” in the capture, you can use the same trick but with the following filter, which exactly matches the SNAT -> dest IPs:
Gives this:
Scenario 3: Incoming DNAT Connection
Let’s have a look at the classical DNAT scenario: You’re hosting a server with internal RFC1918 addresses with a DNAT policy. Now the client is on the Internet and your server on the internal network. Again, two working filter setups.
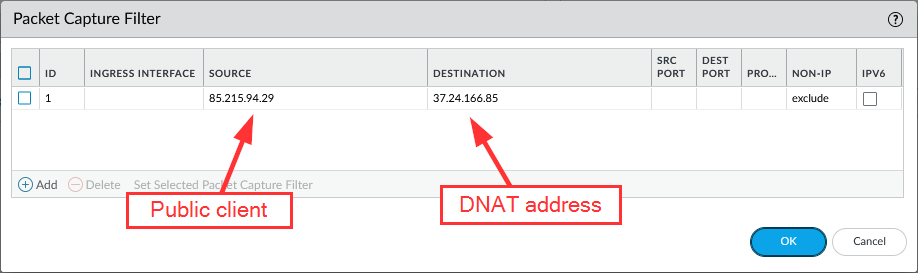
1) public client -> public DNAT:
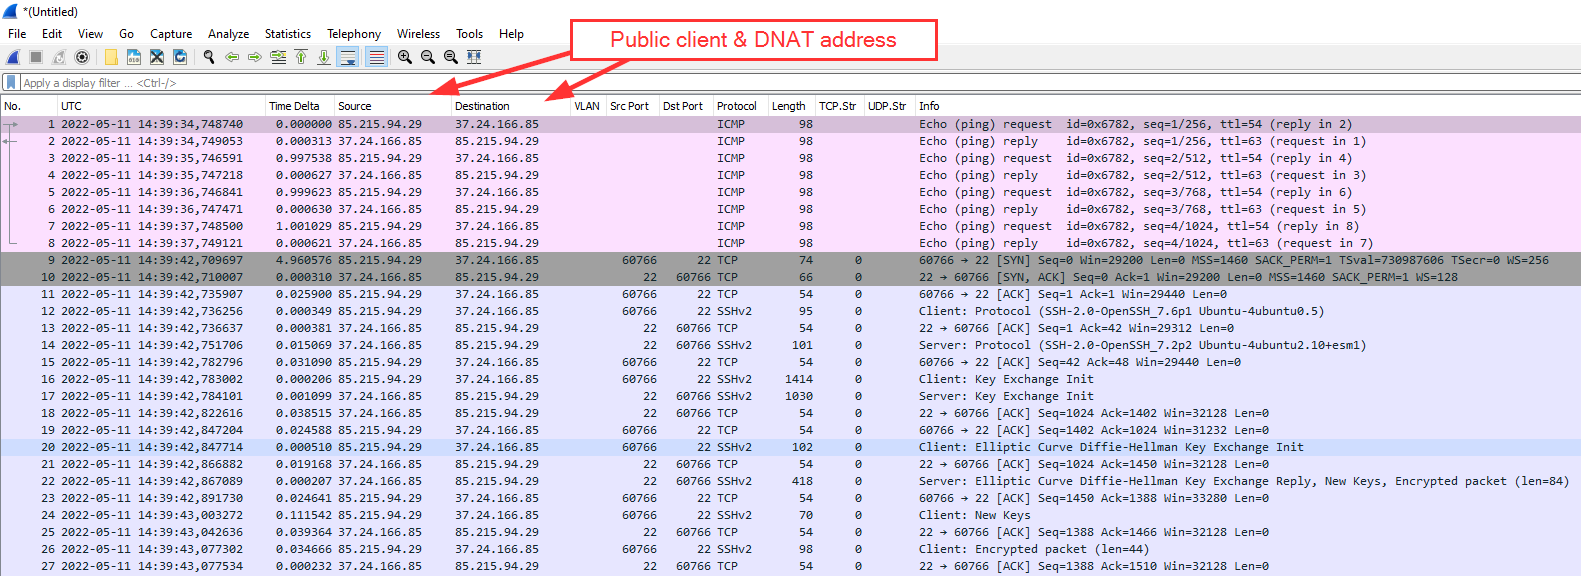
Merging the firewall and the transmit stage:

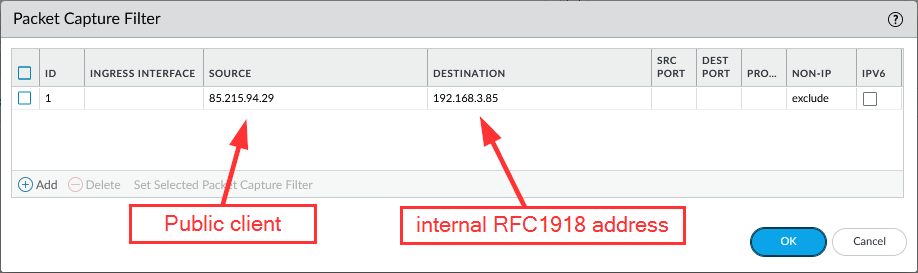
2) public client again -> RFC1918 address:
Merging fw & tx:

Conclusion
I’m still not sure whether this is the best way to do it. If you have better filter ideas, please write a comment. However, having this post as a reminder for myself, I’m fine with it.
Photo by Rae Wallis on Unsplash.
To make the merge of the two files even simpler, you can give the firewall and transmit stages the same filename.