In this tutorial, I will show how to set up a Raspberry Pi with a DCF77 receiver as an NTP server. Since the external radio clock via DCF77 is a stratum 0 source, the NTP server itself is stratum 1. I am showing how to connect the DCF77 module and I am listing all relevant commands as a step by step guide to install the NTP things. With this tutorial, you will be able to operate your own stratum 1 NTP server. Nice DIY project. ;) However, keep in mind that you should only use it on a private playground and not on an enterprise network that should consist of high reliable NTP servers rather than DIY Raspberry Pis. Anyway, let’s go:
At the time of writing (Nov 2018) I am using a Raspberry Pi 1 B (yes, the old one), kernel 4.14.71+ and Raspbian GNU/Linux 9 (stretch). I installed a few relevant packages and gave it a static IPv6 address. Legacy IP (IPv4) is not used at all, only IPv6. [UPDATE Oct 2021: I updated some commands and procedures. I am still using a Raspberry Pi 1 B but with Raspberry Pi OS 10 (buster), kernel 5.10.63+. If you’re using a Raspberry Pi 3 or later, you must replace “ttyAMA0” in this tutorial by “ttyS0”.]
1) Connecting the DCF77 Module
At first, you need a DCF77 module in order to receive the radio clock from Germany. I used the “Conrad” module. It needs a pull-up resistor with 3-10 kOhm between ports 2 and 4 (VCC and DCF-). Have a look at the PDFs from the Conrad store that show the port assignment, as well as these two german pages that give several hints. Long story short: use three cables:
- DCF77 module port 1 (GND): Pi pin 9, GND
- DCF77 module port 2 (VCC): Pi pin 1, +3.3 V
DCF77 module port 3 (DCF+): not used- DCF77 module port 4 (DCF-): Pi pin 10, RXD0 (UART)
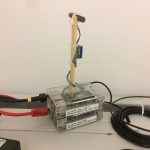
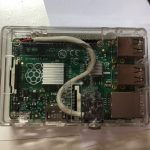
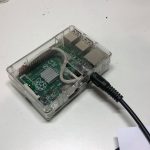
I first soldered the cables directly to the Pi, while I later added a 3,5 mm jack to the housing of the Pi with a 2 meter cable on the DCF77 module:
2) Installing NTP w/ DCF77 Support
The first step is to install NTP with the support of DCF77. This is not the case if you’re simply doing a sudo apt install ntp. Anyway, please install the NTP server with this command first in order to have the startup scripts in place, etc.
|
1 |
sudo apt install ntp |
After that you need to build NTP from source (note the “–enable-RAWDCF” option) which involves the following steps:
|
1 2 3 4 5 6 7 8 9 10 11 12 13 14 15 16 17 18 19 20 21 |
sudo nano /etc/apt/sources.list # uncomment the line with "deb-src" deb-src http://raspbian.raspberrypi.org/raspbian/ stretch main contrib non-free rpi sudo apt update sudo apt -y build-dep ntp # download the latest ntp: https://www.ntp.org/downloads.html # in this example it was 4.2.8p12 wget http://www.eecis.udel.edu/~ntp/ntp_spool/ntp4/ntp-4.2/ntp-4.2.8p12.tar.gz tar zxf ntp-4.2.8p12.tar.gz cd ntp-4.2.8p12/ # note: the following step takes some time: ./configure --enable-RAWDCF --prefix=/usr # note: the following "make" takes even longer, especially on an old Pi 1 B make sudo systemctl stop ntp.service sudo make install # to disable updating ntp via apt, echo the following: echo "ntp hold" | sudo dpkg --set-selections sudo systemctl start ntp.service |
(Fun fact: Since I am running my NTP server via IPv6-only meanwhile the NTP download page is IPv4-only, I had to download and copy the ntp package from another machine to the Raspberry Pi. Sigh. Yes, I know, DNS64/NAT64 would solve the problem.)
You have just installed the latest version of NTP, while “holding” the ntp package within dpkg to not overriding/downgrading it with future “apt update”s. You can verify this with the following: (Note the “h” in the very first column which indicates that the ntp package is on hold.)
|
1 2 |
pi@ntp1-dcf77:~ $ dpkg -l | grep ntp hi ntp 1:4.2.8p10+dfsg-3+deb9u2 armhf Network Time Protocol daemon and utility programs |
Similarly, you can verify the running ntp version with:
|
1 2 |
pi@ntp1-dcf77:~ $ ntpq --version ntpq 4.2.8p12@1.3728-o Thu Nov 8 11:51:22 UTC 2018 (1) |
3) Leveraging the Serial Port
At first, you must disable the serial port of the Pi while keeping the port hardware enabled. Open sudo raspi-config, navigate to “Interface Options” -> “P6 Serial” and:
- Would you like a login shell to be accessible over serial? –> No
- Would you like the serial port hardware to be enabled? –> Yes
followed by a reboot when exiting raspi-config.
A very basic test with “screen” should indicate some output, though completely useless:
|
1 2 3 |
pi@ntp1-dcf77:~ $ sudo screen /dev/ttyAMA0 9600 ���� Ctrl+a \ y |
Add the user “ntp” (which runs the ntp daemon) to the “tty” group in order to have access to the tty console. Verify it with the second command shown below:
|
1 2 3 4 5 6 7 |
pi@ntp1-dcf77:~ $ sudo adduser ntp tty Adding user `ntp' to group `tty' ... Adding user ntp to group tty Done. pi@ntp1-dcf77:~ $ cat /etc/group | grep tty tty:x:5:ntp |
In order to have a symbolic link to /dev/refclock-0 (which is needed by NTP later), add the following three lines to the init script from NTP, while commenting out the latter three lines sudo nano /usr/lib/ntp/ntp-systemd-wrapper : [Thanks to the comment from Thomas for keeping it up-to-date.]
|
1 2 3 4 5 6 7 8 9 |
#for using the DCF77 receiver: if [ ! -L /dev/refclock-0 ]; then ln -s /dev/ttyAMA0 /dev/refclock-0 fi #commented out to only use the DCF77 receiver above and not the NTP servers given by DHCP: #if [ -e /run/ntp.conf.dhcp ]; then # NTPD_OPTS="$NTPD_OPTS -c /run/ntp.conf.dhcp" #fi |
Reload the systemctl and restart the NTP process:
|
1 2 |
sudo systemctl daemon-reload sudo systemctl restart ntp.service |
Verify that the symbolic link is present:
|
1 2 |
pi@pi03-ntp1-dcf77:~ $ ls -ahl /dev/ref* lrwxrwxrwx 1 root root 12 Oct 11 16:49 /dev/refclock-0 -> /dev/ttyAMA0 |
Now you need to use driver number 8 from the NTP software in “mode 5” for the Conrad DCF77 module. That is: Open the ntp configuration file: sudo nano /etc/ntp.conf and add your “server” aka DCF77 module in the following way:
|
1 2 |
#DCF77 Conrad module server 127.127.8.0 mode 5 prefer |
I have commented out the default “pool 0.debian.pool.ntp.org iburst” lines but entered a few IPv6 enabled servers as well, though without the “prefer” option:
|
1 2 3 4 5 6 7 8 |
#https://support.ntp.org/bin/view/Servers/PublicTimeServer000388 server ntp.probe-networks.de #https://support.ntp.org/bin/view/Servers/PublicTimeServer001352 server time.hueske-edv.de #https://support.ntp.org/bin/view/Servers/PublicTimeServer000840 server ntp2.301-moved.de #https://support.ntp.org/bin/view/Servers/PublicTimeServer001363 server ntp.fanlin.de |
Finally, restart the NTP daemon: sudo systemctl restart ntp.service.
Now, in theory, the DCF77 receiver should work, but only if you have a good radio signal and quality and the correct angle of the antenna, which was not the case in my scenario at the first time. Use “ntpq -p” to print a list of NTP servers that are in use. As you can see in this example, the “GENERIC(0) .DCFa.” server (first line) was never reached so far:
|
1 2 3 4 5 6 7 8 9 |
pi@ntp1-dcf77:~ $ ntpq -p remote refid st t when poll reach delay offset jitter ============================================================================== GENERIC(0) .DCFa. 0 l - 64 0 0.000 0.000 0.000 ptbtime2.ptb.de .PTB. 1 u 57 64 377 9.207 4.270 4.483 *ns2.probe-netwo 192.53.103.108 2 u 2 64 377 2.553 3.727 4.777 -2a01:4f8:201:41 131.188.3.221 2 u 57 64 377 16.104 -2.650 2.955 +2a02:a00:1009:6 40.179.132.91 2 u 9 64 377 6.683 -0.115 2.329 +2001:4ba0:ffa4: 51.254.155.97 2 u 11 64 377 5.818 -4.302 3.673 |
Have a look at the syslog messages. If they list something like this, you don’t have a good signal quality, while the receiver at least works in general: ;)
|
1 2 3 4 5 6 7 8 9 10 11 |
pi@ntp1-dcf77:~ $ tail -f /var/log/syslog | grep ntpd Nov 8 16:05:59 ntp1-dcf77 ntpd[500]: parse: convert_rawdcf: INCOMPLETE DATA - time code only has 3 bits Nov 8 16:06:04 ntp1-dcf77 ntpd[500]: parse: convert_rawdcf: INCOMPLETE DATA - time code only has 6 bits Nov 8 16:06:08 ntp1-dcf77 ntpd[500]: parse: convert_rawdcf: INCOMPLETE DATA - time code only has 5 bits Nov 8 16:07:00 ntp1-dcf77 ntpd[500]: parse: convert_rawdcf: INCOMPLETE DATA - time code only has 12 bits Nov 8 16:07:04 ntp1-dcf77 ntpd[500]: parse: convert_rawdcf: INCOMPLETE DATA - time code only has 3 bits Nov 8 16:07:07 ntp1-dcf77 ntpd[500]: parse: convert_rawdcf: INCOMPLETE DATA - time code only has 4 bits Nov 8 16:07:18 ntp1-dcf77 ntpd[500]: parse: convert_rawdcf: INCOMPLETE DATA - time code only has 12 bits Nov 8 16:07:24 ntp1-dcf77 ntpd[500]: parse: convert_rawdcf: INCOMPLETE DATA - time code only has 7 bits Nov 8 16:07:55 ntp1-dcf77 ntpd[500]: parse: convert_rawdcf: INCOMPLETE DATA - time code only has 32 bits Nov 8 16:08:00 ntp1-dcf77 ntpd[500]: parse: convert_rawdcf: INCOMPLETE DATA - time code only has 6 bits |
Note that the DCF77 receiver must point orthogonal with its longer side to Mainflingen, Germany, which is south-east of Frankfurt. (Fun fact: Since I am living just a few kilometres in the north of Frankfurt, my actual direction of the receiver must not show to Frankfurt directly, but more precisely to Mainflingen. However, for almost everyone else the receiver must simply “look” into Frankfurt.) Furthermore, you must omit any interfering/disturbing sources such as switching power supplies or the like in the room where your receiver resides. At its best, the receiver is placed outside a building (waterproof, lightning protection!), which is not that easy at all. In addition, I came across some weird observations, since my signal quality was way better as I turned the antenna just a few degrees in one direction. TL;DR: If you’re lacking signal quality, try a few different positions of your antenna. Be creative. ;)
If you have good signal strength and quality, the ntpq -p output should look like this, in which the “GENERIC(0) .DCFa.” source has a reach of 377 while the * symbol indicates, that it is used as the system peer:
|
1 2 3 4 5 6 7 8 9 10 |
pi@ntp1-dcf77:~ $ ntpq -p remote refid st t when poll reach delay offset jitter ============================================================================== *GENERIC(0) .DCFa. 0 l 35 64 377 0.000 -0.019 0.346 +2003:de:2016:33 .PPS. 1 s 34 64 376 6.445 0.496 5.006 ptbtime2.ptb.de .PTB. 1 u 23 64 377 16.437 1.195 3.226 +ns2.probe-netwo 124.216.164.14 2 u 6 64 377 9.554 1.594 2.322 -2a01:4f8:201:41 192.53.103.108 2 u 30 64 377 23.610 -3.326 4.884 -2a02:a00:1009:6 192.53.103.108 2 u 9 64 377 13.279 1.295 5.938 -2001:4ba0:ffa4: 130.149.17.21 2 u 47 64 377 17.065 1.689 7.871 |
4) Adjusting the Fudgetime
You need to adjust the fudgetime of the DCF77 receiver which is the compensation of the offset from the radio clock to the “real” time. That is: You need to compare the time received from your DCF77 module to some other working NTP sources. The offset should be minimal after that.
Without any “fudgetime” options in your ntp.conf file, the “RAW DCF77 CODE (Conrad DCF77 receiver module)”, as it is called by NTP, has a built-in fudgetime1 of 292.000 ms. You can see this with “ntpq -c cv” since it “displays a list of clock variables for those associations supporting a reference clock”:
|
1 2 3 4 5 6 7 8 9 10 |
pi@ntp1-dcf77:~ $ ntpq -c cv associd=0 status=0020 2 events, clk_unspec, device="RAW DCF77 CODE (Conrad DCF77 receiver module)", timecode="-####----####-#---M-S1-----4p-2---2p-2---2--41---1---81---P", poll=33, noreply=0, badformat=2, baddata=0, fudgetime1=292.000, stratum=0, refid=DCFa, flags=0, refclock_time="dfa1a0fa.00000000 Thu, Nov 22 2018 21:41:14.000", refclock_status="TIME CODE; (LEAP INDICATION; CALLBIT)", refclock_format="RAW DCF77 Timecode", refclock_states="*NOMINAL: 00:29:02 (88.06%); BAD FORMAT: 00:03:56 (11.93%); running time: 00:32:58" |
After some time running NTP you will see either this, in which all other NTP servers have a comparable but huge offset (in this situation about 590 ms, while the DCFa receiver is not used due to the “x” in the first column):
|
1 2 3 4 5 6 7 8 9 10 |
pi@ntp1-dcf77:~ $ ntpq -p remote refid st t when poll reach delay offset jitter ============================================================================== xGENERIC(0) .DCFa. 0 l 52 64 37 0.000 -0.792 2.046 -2003:de:2016:33 .PPS. 1 s 48 64 36 7.255 591.525 3.128 ptbtime2.ptb.de .PTB. 1 u 41 64 37 15.637 590.647 1.982 +ns2.probe-netwo 124.216.164.14 2 u 43 64 37 9.333 591.296 1.737 +2a01:4f8:201:41 131.188.3.221 2 u 45 64 37 24.371 586.926 3.137 *2a02:a00:1009:6 205.46.178.169 2 u 44 64 37 12.479 592.152 7.343 2001:4ba0:ffa4: .STEP. 16 u - 64 0 0.000 0.000 0.000 |
or this, in which all other NTP servers have a low offset, while the DCFa receiver has one with a much higher negative value (while still not used):
|
1 2 3 4 5 6 7 8 9 10 |
pi@ntp1-dcf77:~ $ ntpq -p remote refid st t when poll reach delay offset jitter ============================================================================== xGENERIC(0) .DCFa. 0 l 5 64 77 0.000 -593.24 1.561 -2003:de:2016:33 .PPS. 1 s 60 64 73 7.738 -0.359 0.778 ptbtime2.ptb.de .PTB. 1 u 64 64 77 16.143 0.222 1.091 +ns2.probe-netwo 124.216.164.14 2 u 61 64 77 9.862 0.471 0.862 +2a01:4f8:201:41 192.53.103.108 2 u 61 64 77 23.879 -4.579 0.615 *2a02:a00:1009:6 205.46.178.169 2 u 63 64 77 12.489 -0.316 1.477 2001:4ba0:ffa4: .STEP. 16 u - 256 0 0.000 0.000 0.000 |
–> Now you need to adjust the fudgetime1 to compensate for this difference. In my case, since the pre-configured fudgetime was 292 ms while my offset of the DCF77 receiver was about -592 ms (hence needed an even higher compensation), I had to add a fudgetime1 of 292 + 592 = 884. Open the configuration file again: sudo nano /etc/ntp.conf and add the following below your “server 127.127.8.0 […]” line:
|
1 |
fudge 127.127.8.0 time1 0.884 |
Followed by a restart of NTP: sudo systemctl restart ntp.service.
A couple of minutes later you should have very small offsets among all NTP servers, the external ones as well as your DCFa receiver:
|
1 2 3 4 5 6 7 8 9 10 |
pi@ntp1-dcf77:~ $ ntpq -p remote refid st t when poll reach delay offset jitter ============================================================================== *GENERIC(0) .DCFa. 0 l 63 64 377 0.000 -0.451 0.857 -2003:de:2016:33 .PPS. 1 s 47 64 175 7.557 0.539 2.272 ptbtime2.ptb.de .PTB. 1 u 49 64 377 15.739 1.224 0.850 +ns2.probe-netwo 124.216.164.14 2 u 42 64 377 8.975 1.550 0.757 -2a01:4f8:201:41 192.53.103.108 2 u 52 64 377 24.224 -4.928 2.822 +2a02:a00:1009:6 40.33.41.76 2 u 49 64 377 12.530 -0.400 2.792 2001:4ba0:ffa4: .INIT. 16 u - 128 0 0.000 0.000 0.000 |
Very good! You’re almost done.
5) Reducing Ethernet Latency
One hint from David Taylor about reducing the Ethernet latency on a Pi: Adding another option to the single line in sudo nano /boot/cmdline.txt that states: smsc95xx.turbo_mode=N (reboot needed) reduces the “delay” as shown in the “ntpq -p” from NTP clients querying the Raspi as the NTP server. For the following test results, I used two Raspberry Pis connected via a single switch, the first run time without the option, and the second run with the option set on both Pis. The delay between those NTP servers decreased from about 0.916 ms to 0.632 ms, which is 0.142 ms per Pi. Nice. [UPDATE: it seems that this file is now at sudo nano /boot/firmware/cmdline.txt]
|
1 2 3 4 5 6 7 8 9 10 11 12 13 14 15 |
# BEFORE pi@ntp1-dcf77:~ $ ntpq -p remote refid st t when poll reach delay offset jitter ============================================================================== GENERIC(0) .DCFa. 0 l - 64 0 0.000 0.000 0.000 *2003:de:2016:33 .PPS. 1 s 28 64 377 0.916 1.125 0.759 ptbtime2.ptb.de .PTB. 1 u 26 64 377 9.782 1.081 0.419 # AFTER pi@ntp1-dcf77:~ $ ntpq -p remote refid st t when poll reach delay offset jitter ============================================================================== GENERIC(0) .DCFa. 0 l - 64 0 0.000 0.000 0.000 *2003:de:2016:33 .PPS. 1 s 24 64 377 0.632 0.120 0.737 ptbtime2.ptb.de .PTB. 1 u 35 64 377 9.444 1.592 0.554 |
[UPDATE Oct. 2024: New tests with a Raspberry Pi 3 B Rev 1.2, Raspberry Pi OS 12 (bookworm), kernel 6.6.51+rpt-rpi-v7 showed again, that the delay from various NTP-clients to the NTP-server (the Raspi) decreased by 0.133 ms with this features. Nice!]
That’s it for now. Cheers! If you have any suggestions, please write a comment.
Links
This post used several information from a couple of (german) articles and posts:
- (de) Raspberry Pi Geek – Raspberry Pi als Funkuhr und NTP-Stratum-1-Zeitserver
- (de) debuglevel. – Raspberry Pi und DCF77 Empfänger von Conrad
Featured image “dcf77 module-stapel” by ledmaster33 is licensed under CC BY-NC 2.0.


Hello Johannes ,
I’m wondering if building NTP from sources is really necessary. Why are you doing this ?
Many thanks for your tutorial, very clear :)
Regards
Hey Pete,
using the ntp packages via “apt install ntp” misses the driver for the raw DCF77 receiver. Hence, you need to install it from sources. Especially this line for configuration:
./configure --enable-RAWDCF --prefix=/usrOtherwise you won’t be able to use those DCF77 receivers.
And in general: Only when installing/updating the ntp packages from its source, you are getting the most current (and bug-fixed) versions.
Hello Johannes,
At the time of writing (Apr 2020) I am also using an old Raspberry Pi 1 B, kernel 4.19.97+ and Raspbian GNU/Linux 10.3 (buster).
The install of ntp from Debian packages “apt install ntp” works :)
I started this project a long time ago (3 years). I recently decided to re-install the Pi, so I re-started using old tutorials (the “2 german pages” indeed).
I have followed your tutorial starting with §3 : this is why I missed the ntp installation from sources …
=> Do you know if possible to check the Debian’s package configure options ?
Thanks again for your tutorial :)
Regards
Hey Pete,
uh, I don’t know. But Google is your friend. ;)
Cheers
Johannes
> Do you know if possible to check the Debian’s package configure options ?
For the current version in Debian Buster: https://tracker.debian.org/media/packages/n/ntp/rules-14.2.8p12dfsg-4
There you’ll find all used flags for ‘configure’.
Compiling ntp from source has a crucial disadvantage in my opinion:
it does not contain the recommended/needed patches for Debian (https://sources.debian.org/patches/ntp/)
Many thanks Patrick, exactly the info I was looking for :)
That’s perfectly clear now !
Best regards
Pete
Hi.
I’m using a Symtrik-RFT-77 module directly connected to the GPIO of a RPI. The reference signal is another RPI with a DCF77 transmitter program from Andreas Spiess, that is working OK, setting the correct time on several DCF77 clocks.
My problem: I can’t get the /dev/refclock-0 after the modification of the /etc/init.d/ntp file and restart of the NTP service.
I only can see the RPI getting data from the DCF77 receiver, if I do a manual command “sudo ln -s /dev/ttyAMA0 /dev/refclock-0”. But after a reboot, I have to give that command again.
What did I do wrong?
Bad results…
Aug 27 11:19:00 RPI-DCF77-Receiver ntpd[24248]: parse: convert_rawdcf: start bit / parity check FAILED for “###############RADMLS1248124P124812P1248121241248112481248P”
Aug 27 11:20:00 RPI-DCF77-Receiver ntpd[24248]: parse: convert_rawdcf: start bit / parity check FAILED for “###############RADMLS1248124P124812P1248121241248112481248P”
pi@RPI-DCF77-Receiver:~/ntp-4.2.8p15 $ ntpq -c cv
associd=0 status=0012 1 event, clk_bad_format,
device=”RAW DCF77 CODE (Conrad DCF77 receiver module)”,
timecode=”###############RADMLS1248124P124812P1248121241248112481248P”,
poll=6, noreply=0, badformat=1, baddata=0, fudgetime1=292.000, stratum=0,
refid=DCFa, flags=0, refclock_time=””, refclock_status=””,
refclock_format=”RAW DCF77 Timecode”,
refclock_states=”NOMINAL: 00:00:39 (10.15%); *BAD FORMAT: 00:05:45 (89.84%); running time: 00:06:24″
pi@RPI-DCF77-Receiver:~/ntp-4.2.8p15 $
Hey Rui,
yes, I had bad results for days and days, until I changed the position of the antenna! The DCF77 signal was disturbed by other signal noise. As I placed the antenna outside my room, the signal was perfectly fine.
Ciao
Johannes
Maybe a little bit late, but I had the same problem. So the answer may be helpful for others: It seems that this is because Raspian uses now systemd as init process. I’m not an expert in this topic, but for me it seems that there are the “old” init scripts in /etc/init.d but they (or at least the ntp script) are no longer used.
Therefore, the change of /etc/init.d/ntp has no impact. Instead, the file /usr/lib/ntp/ntp-systemd-wrapper (this file is called by /usr/lib/systemd/system/ntp.service) should be modified. The modifications are the same than in /etc/init.d/ntp .
What I don’t know is whether there can be situations where /etc/init.d/ntp is executed anyway. To be safe, I modified both files and it worked for me.
@Johannes: Thank you very much for this great tutorial. Maybe you could verify my answer and add this to the tutorial?
Uh, kann gut sein, dass mein Tutorial hier schon wieder veraltet ist. Das geht ja leider schnell. :( Danke dir für den Hinweis! Wenn ich irgendwann mal dazu komme und die Schose noch mal aufsetzen werde, werde ich das korrigieren. Don’t wait for it. ;)
Thanks again for your comment, Thomas. I just updated the tutorial!
Johannes,
are you saying, that your setup has a delay from antenna to Raspi calculating the actual time of almost one second? That would scare me.
>fudge 127.127.8.0 time1 0.884
Fabian
Yup. Unfortunately, that’s correct. But since it is quite stable (the jitter is very small), I don’t care. Should I?
Johannes
Thanks a lot for the how-to.
I have a Gude ‘Expert Mouse Clock 0107’ (DCF77, USB) device connected to a Raspberry Pi 3 with Raspbian 10.4.
What I don’t understand…
After installing ntp via ‘apt-get ntp’ (currently ntpd 4.2.8p12) I’ve configured the device with ‘server 127.127.8.0 mode 19’ in /etc/ntp.conf. After some time ntpd automatically selected it as preferred source in ‘ntpq -p’.
The output of ‘ntpq -c cv’ contains
‘RAW DCF77 CODE (Expert mouseCLOCK USB v2.0)’ and
‘refclock_format=”RAW DCF77 Timecode’.
So, why do we have to compile ntp with ‘–enable-RAWDCF’?
Uh, interesting. Maybe it is compiled with RAWDCF support by default.
At least if you want to update your ntp version to the lasted one, you have to do it manually anyway. The current version is 4.2.8p15. The operating systems are not updating their versions of ntp to the newest one by themselves. ;( Refer to: https://weberblog.net/updating-ntp-servers/
Cheers
Johannes
Regarding to https://tracker.debian.org/media/packages/n/ntp/rules-14.2.8p12dfsg-4 4.2.8p12 is not compiled with –enable-RAWDCF, but for any reason the device can be used.
The question is, what is –enable-RAWDCF for, what will be better, enabled or changed by using this parameter compared to omit it.
Got it… using ‘–enable-all-clocks –enable-parse-clocks’, that’s the default for the Debian ntp-package, automatically enables RAWDCF (=> no need to use ‘–enable-RAWDCF’).
Nice! Thanks for that. ;)
Okay so I am also using the Raspberry Pi 1 B, kernel 4.19.97+ and Raspbian 10.3.
Can you please tell me is building NTP from sources is really important!
Thanks for your help.
Would you be able to kindly advise me is building NTP from sources is truly significant!
Much obliged for your assistance.
At the time of writing, it really was mandatory to get the DCF77 support. I don’t know if this has changed in the meantime. (Using GPS as the time source is more common, hence this driver is enabled by default, while DCF77 is not.)
Anyway, if you’re using the NTP server (aka Raspberry Pi) for the public Internet, such as the NTP Pool, you should update the software on a regular basis to not have any security issues, etc. See: https://weberblog.net/updating-ntp-servers/
At the latest then you have to build it from the source…